I have been making this Thermomix Yoghurt recipe for over 10 years at least once or twice a week and it always comes out perfect! It saves us an absolute fortune and it makes really yummy yoghurt too.
I use the recipe from the Every Day Cookbook (First Edition) for the TM31 – but I personally find the recipe quite “wordy” and very confusing for beginner yoghurt makers (I’m saying this from personal experience!)
So this is my translation on that recipe. I really do hope this helps those of you that have had trouble or those that have never made it. Once you have success you will never need to buy it again!
This is the yoghurt sitting in the Thermoserver, before wrapping in a towel.
With lid and all wrapped up ready for a minimum 8 hour nap.

Thermomix Yoghurt Recipe

Ingredients
- 1 litre(1000g) lite OR full cream milk
- 50g milk powder (not essential – refer to Q&A)
- 1 tablespoon pot set Natural Yoghurt (this is your ‘starter’ – use a reputable brand of natural Greek Yoghurt for your first batch) eg: Jalna, Mundella, Farmers Union, Chris's, Aldi/Woolies/Coles Greek yoghurt.
Instructions
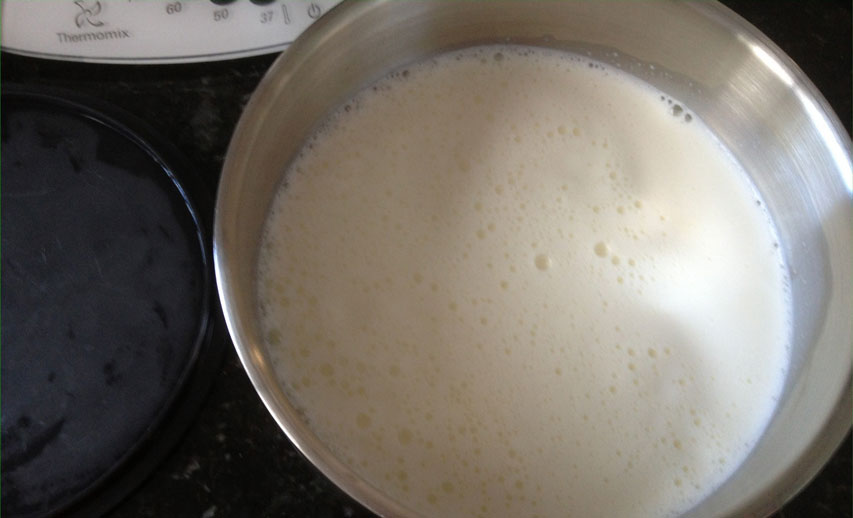
- Pour milk and powdered milk into TM bowl and blend 10 sec / speed 7.
- Cook 30 mins / 90°C / speed 3. (If cooked on speed 1 (which the EDC recipe suggests) you will get a burnt film of milk on the bottom of your bowl - which does come off quite easily after – however if cooked on speed 3 there is nothing left on the bottom!
- Then place TM bowl into fridge for approx. 40 mins to drop temp down to 37°C (put a timer on so you don’t forget!) Or place somewhere cool but it will take a lot longer to cool down.
- When 40 mins is up – place TM bowl onto unit and temperature light should light up on the 37°C or 50°C. If it lights up on 50°C or higher – place bowl back into fridge for another 15 mins. Then take out and test again.
- The 37°C temp is crucial for the yoghurt to be a success. You need to wait for the 37°C light to go OUT so you know it is no hotter than 37°C. The bowl will be warm to your hands, but not hot.
TM5 TM6 note: For correct temperature, just make sure the temperature display reads 37°C - If you accidentally forget it in the fridge and it gets way below 37°C – don’t worry just place it back on to heat up again for say 5 mins / 37°C / speed 3. Once you see the light come on at 37°C you can then stop it. I say 5 minutes as you need to have a time set in order for the temperature to work. Remember the golden thermomix cooking rule of TIME, TEMPERATURE, SPEED.
- Once at 37°C add 3 tablespoon pot set natural yoghurt and mix 4 sec / speed 4.
- Cook 10 mins / 37°C / speed 3.
TM31, TM5:
- At this time pre warm your ThermoServer with boiling water from kettle. This also serves to sterilise the ThermoServer.
- When 10 mins of cooking is finished – drain water from ThermoServer – then pour the cooked milk into ThermoServer.
- Wrap ThermoServer in a thick towel or blanket to keep warm for a min of 8 hours (leave it somewhere in the house where it will be left undisturbed) – it can be left up to 24 hours! (The longer you leave it the thicker it gets).
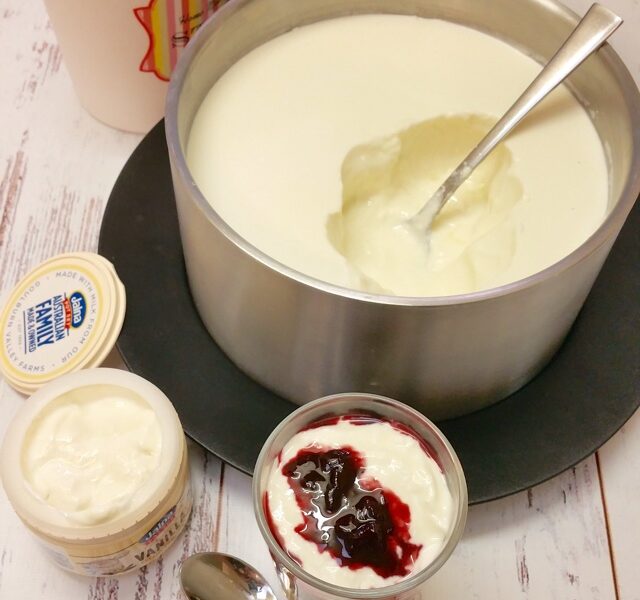
- Pour yoghurt into a container and using a clean spoon, reserve 1 tablespoon in a smaller container to use as a starter for next batch.
TM6:
- With a TM6 you can use the ferment function instead of the ThermoServer keep warm method above. But your bowl will be in use for the next 12 hours, so if you need it for something else, use the ThermoServer method above.
- Select the ferment function. Set 8 hours / 37°C (or up to 12 hours as you prefer). If you want longer than 12 hours, just add more hours after the 12 is finished. I find 16 hours a good combination of thickness and sourness.
- Pour yoghurt into a container and using a clean spoon, reserve 1 tablespoon in a smaller container to use as a starter for next batch.
Notes
This recipe can be doubled. Just add 20% more cooking time & be mindful NOT to go over the 2 litre mark in your bowl.
Assuming you are using a clean spoon each time and not “double dipping” – your yoghurt keeps well in the fridge for up to 3 weeks. If you are away or do not want to make another batch within 3 weeks your starter can be frozen – do not defrost it in the microwave though.
The same starter should last forever … assuming you separate the 1 tablespoon into a small container when you first make your yoghurt – using a clean spoon … the yoghurt cultures are self-perpetuating.
Your yoghurt WILL get thicker and creamier the more frequently you make it using your own starter from each batch.
YOGHURT MAKING FAQs
Q: How do I make yoghurt using UHT milk?
A: Pour UHT milk and milk powder into TM bowl and mix 5 sec / speed 4.
Heat 10 mins / 37°C/ speed 3.
While milk is heating, preheat thermoserver with boiling water
Add yoghurt starter to TM bowl and mix 5 sec / speed 4.
Tip water out of ThermoServer, pour milk/yoghurt mix into ThermoServer. Allow to incubate for 8 hours.
Q: In the middle of winter in a very cold house how can I keep my ThermoServer warm?
A: There are a couple of ways this can be done:
Preheat the oven on a low heat - but then turn oven OFF to leave wrapped Thermoserver in oven.
OR;
Place wrapped Thermoserver on top of an appliance which generates a little heat e.g.: CD player, coffee machine, top of a fridge. The warmer the room the quicker and thicker the results.
However; do NOT sneak a peek or remove lid at all no matter how tempting it is to do this!! You do not want any warmth to escape.
Q: Do I have to use powdered Milk?
A: NO! It's the milk solids in the milk powder that help your yoghurt set thickly. You can make yoghurt without it; the final result will just not be as thick. If you really want your yoghurt thick and don’t want to use milk powder - you can drain it through a muslin cloth to remove the whey and you'll be left with a thicker product.
Q: What is Pot Set Yoghurt (starter)?
A: Pot set yoghurt is any yoghurt for which the ingredients read something like, milk, cream, live cultures. Brand examples are: Jalna, Mundella, Farmers Union, Chris's, Aldi/Woolies/Coles Greek yoghurt. If, when you read the ingredients it includes any thickeners or gelatine etc then it is NOT pot set. It is milk with thickeners and gelatine (and usually has loads of sugar and artificial flavours).
A “starter” contains the live bacterial cultures that help transform milk into yogurt. You can start a batch of homemade yogurt two ways: from a few tablespoons of store-bought (or previously homemade) plain yogurt, or with a yogurt starter powder.
Q: My yoghurt is always too sour.
A: The longer you allow your yoghurt to incubate the sourer it will become. Next time try taking it out earlier. It will be a test and try again until you get the taste that is right for you and your family.
Q: Can I use low fat or skim milk?
A: Yes! You can use any kind of milk: Skim, Hilo, Lite, full cream, long life, lactose free, A2, Soy. Even powdered milk works too!
Skim will just give you a runnier consistency. Milk with permeate in it makes quite runny yoghurt – so try and buy permeate-free.
The more fat in the milk the thicker your yoghurt will be.
Q: My yoghurt has a lot of whey – how can I strain it off?
A: Use a (fresh cleaned) chux cloth or a cheesecloth to strain it after its been incubating. The strained yogurt will look something like ricotta cheese or even thicker depending on how much whey is drained. Whisk it well.
If too thick, add some whey or milk back in until the consistency is perfect for you. The whey is very good for you so add it to smoothies or use in place of buttermilk. Straining the whey is a personal choice - personally I don’t bother.
Q: I want to make my yoghurt sweeter so my kids will eat it?
A: A few options here:
- At the beginning of the first step you can add 2 teaspoons vanilla essence and 30-50g sugar.
- Or you can add the seeds from a vanilla pod or use vanilla paste.
- Or you can add a tablespoon of honey after the milk has finished the heating step.
The ‘Vaalia’ brand French Vanilla yoghurt also works well as a starter – as it results in the yoghurt to not be as tangy or sour.
Other ways of sweetening it at the time of serving it are:
- Honey and cinnamon - Just heat up the honey so it mixes in smoothly into the yoghurt
- Jam
- Lemon curd
- Maple syrup
- Lime and Ginger Curd
- Passionfruit
- Passionfruit Curd
- Puréed strawberries
- Strawberry Sauce or the Berry Coulis (EDC) – I have used the same recipe using banana and also rockmelon. I would think most fruits would work.
If you want to make coconut milk yoghurt we have had ThermoFun Facebook Likers suggest this recipe on Healthy Healing Food.
For more great Thermomix tips and recipes join our free monthly newsletter and check out our e-cookbooks.
Let us know in the comments below how you went making your Thermomix yoghurt!
If you want to make coconut milk yoghurt we have had ThermoFun Facebook Likers suggest this recipe on Healthy Healing Food.


Anne says
Do i need to keep it warm after preparing it. I had in my cold oven for many hours then in fridge and it has not been opened but not set Overnight.
Will it set anyway? Seems to be a hit and miss and last time i made it same recipe it set to my surprise a couple of days later i think. Not sure if i did anything different. Rsvp. Thank you.
thermofun says
Yes you need to keep it at 37 degrees for at least 12 hours. Easiest way is to warm the oven to 50 degrees, turn it off then put the warm milk and yoghurt starter mixture in a thermoserver, in the switched off oven. I've also kept it warm by the fire.
I think if you put it in the fridge too soon, it likely will not set. You could warm it up again and try again, but I would worry it might develop undesirable bacteria, as that's a long time not refrigerated.
Have you got a TM6 - that has a keep warm (fermentation) setting which makes it very easy.
Kaye says
I've tried this 3 times now, the first time with milk powder, but we didn't like the taste, so the second 2 times I made it with just 1lt milk and 3 Tbs good quality Greek Yoghurt. First with full cream milk (permeate free), then with just standard blue top (not low fat) milk. Each time I've ended up with yogurt so runny it's like drinking yogurt. I did it on ferment mode 37 degrees in the bowl of the tm-6 for 8-12 hours. I'm wondering if I need to do the temp higher. 40 or 45 degrees? Would appreciate any help!
thermofun says
Hi Kaye,
The milk powder certainly helps with thickness. Though I usually use low fat milk, so maybe with full fat that whouldn't matter. I do warm it up to 40 degrees at the beginning, but then ferment at 37. But I do let it ferment for 16 hours - try that it might make it better.
You can use any natural yoghurt, not just greek. And I only use a teaspoon, you should not need 3 table spoons.
Hope that helps, let me know how you go
Kaye says
Thanks for your reply! Trying it again now so I'll pre-warm the milk to 40 and ferment for 16 hours as you suggest. Will luk how it goes. I've used my last batch of yoghurt (strained) as starter.
Also I notice you say to heat treat the milk 30m 90d, I think I was half following another recipe that said to just briefly heat it to 70. Could that make a difference to yoghurt thickness?
1tsp? Do you mean starter? Your recipe says 3 Tbs?
thermofun says
Hi Kaye,
I do think 70 vs 90 would probably make a difference. I just checked a few sites and they all say above 80. My recipe is just based on the original recipe from the Thermomix every day cookbook. I hadn't noticed my recipe says 3tbsp, I've just used less over time and it makes no difference. lol. I'll update the recipe :)
Amanda says
Hi just wondering the nutritional break down for this recipe and how many servings? Cheers
thermofun says
Hi Amanda, sorry we don’t have the nutritional content. Because it’s a natural fermentation process, the result will be quite variable. But it will be similar to the milk it was made with.
Maybe we have a microbiologist reading who can give a better answer!
A litre of milk makes about a litre of yoghurt, so the number of serves depends how much milk you start with, and your serving size.
Kaitlyn says
Hi! I’ve cheated and made easiyo in my TM6 which has been super handy because I set it straight into small jars for the kids to use.
After the first set of steps (prior to fermentation) can I pour the mix into the same jars and let them set in the jars on ferment mode rather than in the bowl?
So
Much less mess when transferring!
thermofun says
Hi Kaitlyn, I haven't used an easiyo, but I don't see why not. The fermentation step just keeps the mix warm (37 degrees) while the bacteria do their thing. So if you keep your jars at that temperature for 12 or so hours it would do the same thing. I would recommend sterilising your jars with boiling water before you pour in the mix
Kaitlyn says
Managed in the TM6 and the kids INHALED it! I can’t believe we had success first go (having only used sachets before)
I have to double the batch next time, do I need to increase the quantity of the starter for doubling?
thermofun says
Hi Kaitlyn, so glad you had great success! No you don't need to double the starter. In fact my hubby, who makes most of the yoghurt here, usually only uses a teaspoon no matter how much he is making. You should increase the heating time by about 5 minutes though as it will take longer to get to 90 degrees.
Bermarlan says
It would be helpful if the amount of milk was also put in grams. I think original recipe called for 800g which always worked but 1L from what I can see generally translates as 1000g which is quite a difference. I found the 1 full litre results in a thinner yoghurt than used to but will see how this 800g attempt goes. Thanks!
thermofun says
It’s the amount of powdered milk, rather than the amount of milk that affects the thickness of the yoghurt. You can decrease or increase the powdered milk to your desired consistency. Full cream milk makes thicker yoghurt than light milk. I make any quantity of yoghurt from 400g to 1500g and to be honest I just throw in a random amount of powdered milk :)
The biggest varying factor is the temperature stability during fermentation. If I use the TM6 fermentation function it’s very consistent.
Teresa says
Hello...I made this yogurt a year ago and it was delicious
I've just decided to make it again, using
1 litre uht full cream milk
50g full cream milk powder
And 3 TB of Jalna pot set greek yogurt...it's currently in thermoserver fermenting
I'm very confused and hope you can help
Please explain it to me like I'm 5 😊✨️
1. When making a fresh batch, Do I use 3 Tb of pot set to make a fresh batch?
2. Do I keep aside only 1 TB of this yogurt to make another yogurt in a week?
3. When using UHT milk...do I disregard the step of 30 mins at 90degrees? And just do 10 min 37 speed 3? With only uht milk and milk powder? Then adding 3 TB (if new fresh batch) or 1 Tb ( using my starter when I make it next week)
Please help?
Thankyou so much ❣️
Teresa
thermofun says
Hi Teresa,
great questions!
1. yes, use 3Tbsp of pot set natural yoghurt as a starter. To be honest you can use pretty well any natural yoghurt, it's just the pot set ones give me best results. You just can't use yoghurt that has thickeners added to make it set, as they may not contain the suitable bacteria for natural yoghurt
2. Yes, keep aside a tablespoon of the fresh batch for use next time. I often only keep a teaspoon or so. And I have had no problems keeping the starter for up to two weeks.
3. Yes with UHT you can skip the 30 minutes at 90 degrees step. Because the milk has already been high temperature treated. Having said that I've never had much luck with UHT milk. It's always a bit runny.
Hope that helps!
Steve (Mr ThermoFun :)
angela says
Hi, if I only use half of the recipe, i.e. 500ml of milk, do I need to decrease the cooking time? maybe from 30 mins to 24 mins?
Thank you.
thermofun says
Hi Angela,
I've never reduced the cooking time and I often vary the amount of milk. It comes up to temperature fairly quickly and I think it needs a fair amount of time to make the changes to the milk proteins to allow the fermentation to process properly. If you increase the amount of milk you should add some extra time to allow it to come up to temperature.
Annette says
I always used this recipe for yoghurt when I got my first Thermomix (TM31) many years ago. When I got my TM5 I thought I’d do the automated yoghurt but after several not up to scratch efforts I’ve gone back to this recipe. Never fails! Thanks for a great web page!
thermofun says
oh wow thank you Annette. I am inclined to agree!
Sam says
Made yoghurt for the first time , I’ve had my Thermomix for 8 years and have always thought it looked to hard!
Your break down of the recipe was so easy!
My dishwasher had just completed a cycle so I emptied it and place my wrapped thermo server in there for 8 hours. It’s perfect and so thick.
I used full cream powdered milk Plus the extra 50g.
So happy thank you
thermofun says
Fabulous to hear Sam! I must admit I would never have thought of utilising a warm dishwasher! Great thinking! That would also work well for proving dough too! :)
carol says
Made the best greek yogurt 1st attempt. Thankyou
thermofun says
Fantastic to hear Carol! Thank you!
Camilla says
I don’t have a thermoserver but I have dream pot would that work if I preheat with boiling water
thermofun says
Camilla, I'm not sure of what a dream pot is but it could work if you prewarm it with boiling water and then keep it wrapped up in a towel in a warm spot.
Bronte says
Do you do anything special to clean/sterilise the mixing bowl first? thanks!
thermofun says
Bronte no I don't. Been making it for years and years with no problem.
Carol says
I do not have a thermoserver or esiyo. What else could I use
Cook With Janie says
Carol, you can culture your yoghurt in a glass jar - I use two 1 litre sterilised jars, sterilised lids to seal, then wrap the jars in a beach towel inside a cool bag or esky for the culturing time. I also find it's important to not move the cool bag during the culturing time. Hope this helps!
Bev says
I have made this a few times now and a big success. I put it in my Hansells yogurt maker for the final stage and perfect.
thermofun says
Thanks Bev, great to hear! :)
Meg Brauer says
I have made this yoghurt using your recipe too many times to count and it has always worked perfectly. Until the last two times I’ve made it 😭 The first time my starter yoghurt must have been on the verge of going bad, as when I opened my new batch it smelt like off feta. Obviously I threw that away and started again using Jalna as the new starter. This batch had been wrapped up as usual for 24 hours, I just opened it and it is like runny cream 😩 Any ideas where I might be going wrong?! Should I leave it longer before transferring and refrigerating?
thermofun says
Hi Meg, I'm not sure where you live and what your climate was like when you made it, but all I can think of is that perhaps the room temperature was too cold. Also I tend to only leave mine for 12-16 hours. I hope this helps. If it is any consolation we too have had a couple of batches fail (over many many years) with no obvious reasons. :(
kim says
I don't have a thermo server, is there anything else you can recommend to use to store it in? I have an easiyo, wondering if that would work. thanks
thermofun says
Kim yes I have heard that many use an easiyo. :)
Rhonda says
Hi, to make a FODMAP friendly version, would using the liddles lactose free yoghurt as a starter work?
Ingredients: Fresh Whole Milk, Sugar, Milk Solids, Gelatine, Live Lactic Acid Cultures (Streptococcus thermophilus, Lactobacillus acidophilus, Bifodobacterium lactis). Liddells Lactose Free Yoghurt uses the lactase enzyme.
Lesley says
Thanks for this recipe. I have successfully made it several times now, after my initial attempts resulted in slimy yoghurt!. I do get lots of whey, though. Especially as the week goes on. Think I read somewhere that it was better NOT to store in thermoserver. Have others found they get less whey if they serve in another container?
Thanks
Mel Oliver says
hi, I'm keen to know this too... did you try it?
Zoe says
Hi I was just wondering can u use almond milk
Carolyn says
Keen to know too please:-)
Astrid says
Hi, would this recipe work with soy yoghurt as a starter? My 1,5 year old son is allergic to dairy but loves his soy yoghurt. I have a TM31.
Thank you
Astrid
Tabitha says
First time yogurt maker . !
Turned out amazing 😉.
Added 25g sugar and lemon myrtle oil in first step and ta-da home made lemon myrtle yogurt ❤️❤️❤️
thermofun says
Good on you Tabitha! :)
Jodi Ellem says
I have a easi yo that i've never used, Can I use that instead of the thermie server. Is it the same amount of time.
Anna says
I have been using this recipe for years and have found that it still works well with only 20 mins of heating the milk to 90 degrees. In the TM5 I also find it works well adding yoghurt starter at 40 degrees. Another idea for cooling the milk, I remove the mc and just stir the milk on Speed 3. Just some time savers for me :)
thermofun says
Thank you Anna I will certainly try your tweaks! :)
Jane says
I’ve made lots of different yoghurts with varying degrees of success. This one worked well for me. I added about 20g of sugar to just take the tart taste away. I made it early in the morning and left it for 12 hours during the day to help reduce the tartness. I had a little left that wouldn’t fit in my easi yo container so put it in a small Tupperware container, wrapped that in foil and then a thick towel. Even that set. Yippee! Successful yoghurt.
thermofun says
YAY!!! That's fabulous to hear Jane! Well done! :)
Bronte says
Hi Jane,
When you use the easiyo, do you still fill it to the line with boiling water?
Robert O'Sullivan says
Great recipe, I made it for the first time yesterday and it worked really well. Left mine to ferment overnight (about 12 hours) - it was fairly thick, but gave off a lot of whey and I found the consistency too thin when I whisked the whey back in (I was after Greek-style yoghurt), so I did end up straining mine using a sieve with a double lining of muslin - the end result is really good, very thick and creamy. I managed to find a full-cream milk that is almost 5% fat, and I used Farmers Union Greek-style yoghurt as the starter. Only other issue I had was that it took AGES for the milk to come down to temperature - over an hour in the fridge. Did some research while I was waiting - strictly speaking it's not essential for the temp to come down to 37 C - just has to be below 45 C, or the bacteria will be killed, and the problem is that (at least on the old TM31), if the contents of the bowl are cooling from a high temperature, once the temp drops below 50 C the only indicator light will be 37 C, which is misleading (the temp could be anywhere between 37 and 49.9 C). I ended up using a little milk thermometer (the kind used by baristas) and added the starter at a temp of about 43 C. The final result proved that I hadn't killed my culture!
thermofun says
Great detailed description. Thanks Robert :)
On a cool day, I put my bowl outside in the breeze (with the MC on) which I find cools much faster than the fridge.