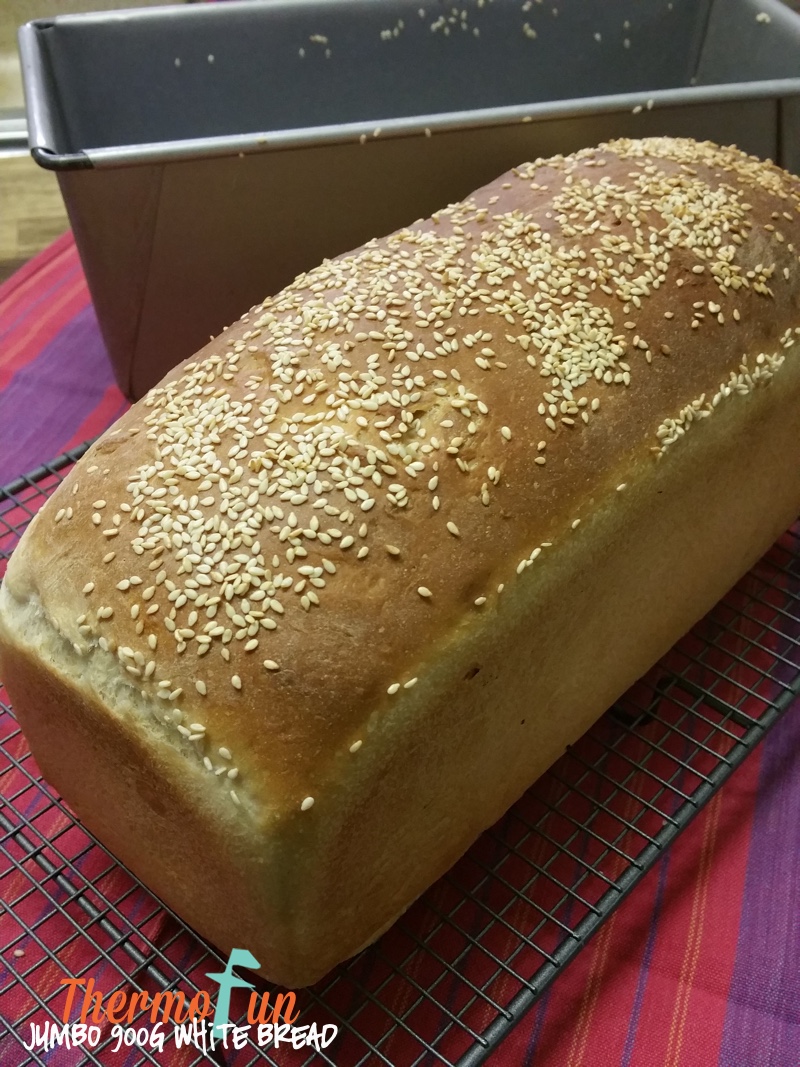
This week we are shining our Member Spotlight on Lailah Drummond!
Lailah is a ThermoFun Club Member and shares with us her amazing bread recipe. This recipe was loved by all on the 2015 March ThermoFun Cook Along. I am absolutely delighted to have Lailah's permission to publish her recipe on my website. Thank you Lailah!
Notes and tips from Lailah:
- PLEASE NOTE DIFFERENT BATCHES OF FLOURS CAN GIVE DIFFERENT RESULTS, THE WEATHER CAN ALSO EFFECT YOUR DOUGH. IF YOUR DOUGH IS TOO STICKY AFTER KNEADING ADD A LITTLE MORE FLOUR AND KNEAD FOR A LITTLE LONGER. TAKE NOTE FOR NEXT TIME YOU MAKE IT. ***
- *** PLEASE STAND BY YOUR THERMOMIX AT ALL TIMES WHEN KNEADING ***
Proving
- The time needed to prove will vary depending on the weather and temperature where you live. Mine generally take around 1 hour for a loaf or 1.5 hours for rolls proving normally, or around 40 mins using the steamy oven technique. Make sure to not overproof your bread or the gluten structure will collapse when you bake it - resulting in a heavy dense bread.
- A good way to see if your bread is ready - poke it firmly with your finger. If your finger mark stays in the dough you need to continue proving for longer. If the finger mark pops back out and goes away your bread is ready to bake. If the dough completely collapses you've most likely overproved.
- Steamy oven technique - If the weather is very dry & isn't very warm I fill up a big dish with boiling water and place it in the oven (turned off & closed) with the bread or rolls. After 30 mins or so i refresh the water with new boiling water. The hot water creates a lovely moist 'sauna' which makes the dough prove very quickly. Once nearly to the size i want, i take the bread out and preheat my oven. This only takes around 40 mins to prove this way.
Adjusting Quantity
- You can half the batch. Adjust the kneading time to 3 minutes & 20 seconds, instead of 6 minutes.
Making Bread the Night Before
- Once you have placed your dough in the tin, immediately cover & place in the coldest part of your fridge. This will slow the yeast down. In the morning pull your tin out and allow it to finish proving in a WARM place.
Bread Tin
- I use this tin from Alyce Alexandra
- I can fit 3.5L (14 cups) of water in it. If you have a smaller tin you can make a couple bread rolls & a loaf.
Plain Rolls and Cheese and Bacon Rolls
- If you want to use this dough to make bread rolls it will produce 12 normal sized rolls, or 24 dinner rolls.
- You can use this dough for cheese & bacon rolls - after proving & just before baking, pop a handful of mixed cheese & bacon on each.
Scrolls or Twist Loaves
- Once you've punched down in step 4, roll out and pop your favourite toppings on, roll up & cut. Place on a baking tray to prove for a while, then just before baking top with grated cheese.
- And heres's a fab video on how to make and cut scrolls : https://www.youtube.com/watch?v=obadptogmo0&feature=youtu.be
Pizza Bases
- A full batch will make 4 x 250g pizza bases. Once you've knocked down in step 4, divide into 250g lots and place the balls of dough into 4 oiled bowls to prove. Once lovely and big, tip onto a floured bench & roll out.
Recipe Chatter from ThermoFun members on the March Cook Along:
Marion
I cooked my loaf today. Added a couple of tablespoons of chia seeds into the dough, used vitamin c instead of bread improver and sunflower seeds on top. Delicious.
Judy
Beautiful dough to work with. I've just made a square loaf by putting a piece of baking paper and then a heavy baking tray on top when cooking, and it's turned out well ... apart from the long sides getting a bit banged up 'cos I forgot to grease the sides of the tin. The heavy baking tray is to stop the loaf from rising too much (and becoming a high top with that nice rounded top edge). So if you want a perfectly square loaf like they sell in the shops as a 'sandwich loaf', you need a loaf pan with a lid.
Emma
I have yeast sachets, as this is what I used to use in my bread maker. I'd like to use these up before buying anything else. Each sachet is 7.5g. Does it sound right that I would use one sachet in place of the 2tsp of dried yeast?
Lailah
Yes Emma use 1 sachet of yeast.
Lailah
If it's overproofed it can flop/sink and become icky & dense.
Raelene
I know the dried yeast is to be stored in the fridge... but what about the bread improver?
Lailah
Bread Improver goes in my cupboard.
Sarah
If I don't have a bread tin in time to use for the cook along can I use a loaf pan? Or just shape it and put on a tray?
Lailah
Yes Sandra or you can even make rolls.
Freya
The bread we can get here is very sugary so I want to make it regularly. I have just a couple of questions. We have no access to bread improver (or vitamin c which I saw someone else used), is there something else I could use
Lailah
With improvers I've not tried anything else so that might be a Google question.
Jenny
A trick to getting smooth professional bread rolls is to have them all smooth before proving.
Carli
Made half into cinnamon twists... then a tiny loaf just for kids lunches!

Ingredients
- 360g water, (between normal and lukewarm temperature)
- 1½ teaspoon sugar
- 2 teaspoon dried instant yeast
- 600g bakers flour
- 2 teaspoon salt
- 2 teaspoon bread improver
- 1 tablespoon oil
Instructions
To make a successful LIGHT & FLUFFY bread please follow the instructions & use bakers flour (not regular flour), bread improver & the correct sized tin.
- Place all ingredients into TM bowl in the order listed.
- Combine 15 sec / speed 3.
- Then Knead 6 mins / Interval.
- Rest for 15 mins - leave the dough to sit in your Thermomix with the lid on. Or place in an oiled bowl/thermomat.
- Oil the bench. Tip out dough & knock down.
- BREAD - Place into your JUMBO bread tin.
- ROLLS - Divide the dough into 80g lots. Roll on an oiled bench into nicely shaped balls and place on a tray evenly spaced apart.
- Let prove in a nice WARM draught free place.
- BREAD - If using a lid on your bread you want the dough to be a few cms below your 900g tin. If making a high top you can let it go a few cms above the tin.
- Bake in a preheated oven till GOLDEN BROWN - 180° for 25 mins for bread, and 15-20 mins for rolls.
- Keep in mind all ovens are different temperatures.
- Once the bread is done IMMEDIATELY tip out of the tin.
WARNING FOR PET OWNERS
If dogs or cats ingest bread dough it can actually be fatal! With the yeast in the dough it can actually cause alcohol poisoning or it can expand in the warmth of the stomach of the animal and can explode the stomach. If your pet consumes dough it must get urgent vet medical attention to induce vomiting.
Please be mindful of where you put your dough to rise.
Click Here for more great recipes in a number of e-cookbooks – containing recipes to suit everyone.
If you have enjoyed this recipe then please consider leaving a comment. It’s always refreshing to see comments from people that have tried a recipe and found it a success or tweaked it to suit.


Denise says
Do you have to grease / oil bread tin.
thermofun says
If it is an actual bread tin, no there is no need to grease/oil it.
Annie Masters says
I made this today. It is my "go to" loaf and I usually use half the dough and make 8 small dinner rolls and a smaller loaf. Thanks Lailah. Thanks Thermofun.
thermofun says
Thank you Annie. :)